There are many creative pursuits of mankind which they achieve using their hands. Soldering is one of them. Soldering adds artistic element to the field of electronics. It is a skill that is developed over time by doing.
In earlier blogs, we have learnt about soldering equipment like solder wire, soldering iron and flux. There are some more tools which are needed and which offer a helping hand in the process of soldering. We will learn about some of such tools here.
Cutter: Cutter may qualify as the most versatile tool in the world. From a Dentist to a jeweler to an iron smith, everyone needs a cutter for his work. In electronics, a Cutter is used to trim the legs of a component after soldering. A Cutter can also be used for removing insulation prior to soldering.
- A good Cutter should have insulated grips. The handles of the cutter should be padded to ease out the strain on users hands. It should be lightweight for precision work.
- A good Cutter helps in making a sharp, clean cut. Cutter action should be smooth and clean.
- A Cutter should only be used for cutting copper wires or leads and not for trimming PCBs or metal parts. The cutting blades will be easily blunted if misused.
- One must ensure that the cutting edges of the wire cutter are sharp and clean.
- Side cutters and diagonal cutters are best for cutting component leads.
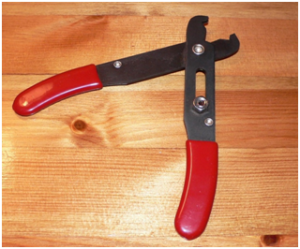
Wire Stripper: It is used to remove insulation from electric wires, without cutting the wire. Mostly a cutter is used to strip the wire but removing insulation off wire using side cutters needs lot of practice. We must use wire stripper for that purpose.
- Before using the stripper, estimate the amount of wire to be removed and place the wire in between jaws of the stripper and squeeze.
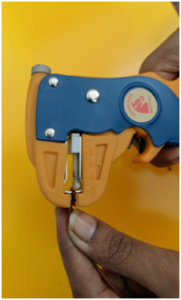
File: It is used to clean and smoothen the surface of soldering iron bit. It is also used to remove dust particles from the leads of the components to be soldered. We can also use sand paper for cleaning the leads of components.

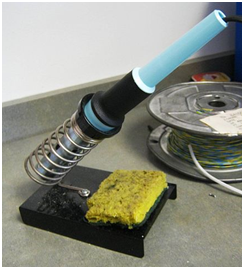
Soldering Iron stand: This is the resting bed for a hot soldering iron. Iron should be kept on soldering iron stand in between work. It prevents the hot iron from rolling around thus protecting the work surface and our hands from burning.
Desolder techniques: If we make a mistake, we can undo it using desoldering technique. Its function is like the undo button in computers. The process of removing soldered component from a circuit assembled on a PCB is called Desoldering.
- Two techniques are commonly used for Desoldering: Wicking and Desolder pump.
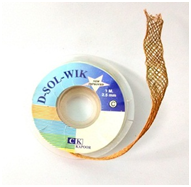
Solder wick: Solder wick is a fine copper braid soaked with flux. The wick action is similar to that of an eraser. This wire is expandable to allow soaking of solder wire. The Desoldering technique using Wick is as follows:
- Place the wick on the top of the solder joint to be desoldered.
- Keep the Iron bit on the top of the wick. The heat of the iron will melt the solder. This solder will be readily soaked up by the wick.
- Cut off the wick containing the removed solder. This process may be repeated twice or thrice till all solder is removed from the joint.
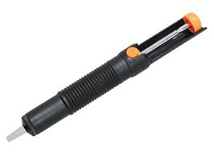
Desoldering pump: This is another device used along with soldering iron for desoldering a joint. It uses a spring loaded mechanism. It is a syringe pump like device which uses vacuum pressure to suck solder off. The pump sucks the molten solder from the soldered joint. The process is as under:
- Heat up the solder joint using soldering iron, till the solder melts.
- At the same time, press the trigger lever and hold the tip of pump against the joint.
- Pull back the trigger by pressing a button.
- At this instant, the tip of the pump sucks the molten solder.
- Repeat this process till all the solder is sucked up by the pump.
How to ensure good soldering
Apart from the tools, two important steps for ensuring a good soldering joint are:
Cleaning the tip: Heat the soldering iron fully. Keep a wet sponge handy. Softly scrape the iron against the sponge to remove the old solder. The tip should be nice and shiny.
Tin the iron: When you put a light layer of solder over another piece of metal, it is called tinning. Hold the solder in one hand and iron in the other, briefly touch the solder to both sided of the tip. This is called tinning the iron.
- Make sure that, the PCB and component to be soldered is stable and does not move during soldering.
- Use filler to clean dust or carbon particles from soldering iron.
- A good joint will be shiny and smooth. A bad solder joint will look dull and grayish.
- Soldering needs focus and steady h
- Never touch the metal part of soldering gun.
- Never leave iron resting on the table.
- Wash your hands with soap and water after soldering.

Mam I liked the blog very much.